2021 - WEBSITOES

Netizen Basic Knowledge Site

Tuesday, August 31, 2021

Success Export Xml from Wordpress to Blogger

This easiest way to export website data from wordpress for further import to blogger by using the Export to Blogger Plugin
  • Install the Export to Blogger plugin then activate it
  • Click on the plugin settings
  • Select type: post, Status: Any, Checklist Category & Tag Convert to Blogger Label, Checklist Category to Export, Just select everything.
  • Click Export XML
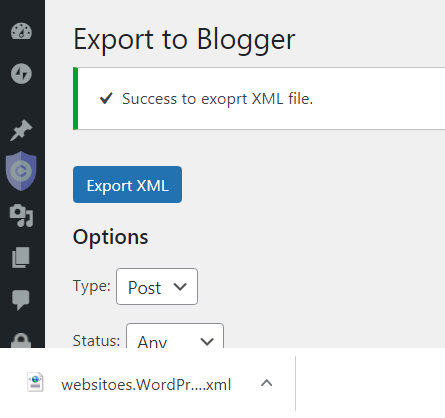
  • The end result of this way of exporting wordpress to blogger is a notification: "succes to export xml file" like this 
    succes-export-xml-wordpress-to-blogger

After your computer device downloads the xml file, in the next step you can directly import it in blogger. this very easy!

Monday, August 23, 2021

How to add blog authors on blogger?

How to add blog authors on blogger? Adding the author to the blog is one solution to solve these problems:
  • The problem is too many webs and blogs exist on the internet, while the quality of the content is very low.
  • Due to the lack of competence possessed by the author, the problem is that not everyone who has the competence as a writer is able to create a quality web / blog. Even if he is capable, not necessarily everyone has the time and opportunity to manage it, because managing a web / blog requires keeping up with developments and trends. Then even if he is able and has time, it is not certain that he will have a lot of money for management costs, because blogging requires adequate capital for sustainable management.

If you intend to create a multi-author blog, that's also great for SEO. Google really likes that ....

How to add? You can do this tutorial for the blogger platform blog :
  • Enter the dashboard >> Settings >> Permissions
  • On the Invite More Authors menu: Enter the email address of the prospective author.
  • On the Pending Author Invitations menu: You will see the number of authors that you have invited but have not accepted the invitation. The issue of not approving may also occur because he or she does not know that the invitation email message can go to the spam email inbox and it can also go to the social box. And to approve, it takes the email that is used by default as the main email on the PC or Android device that he uses.
  • On the Blog Admin and Author menu: You will be able to see the number and names that are ready to help you increase your blog content. You can also make him an admin at your level, it's just that you need to be careful, because an author who has been made an admin can remove your position and he can also invite new authors like you before, he can also access settings and data as the blog owner on generally.
That's how to add a blog writer, and also an admin.

Thursday, July 15, 2021

3 Important Features on WhatsApp that Netizens Often Forget

There are 3 Important Features on WhatsApp that Netizens Often Forget. WhatsApp is the most widely used type of social media application.

Almost everyone uses this application for the convenience of communicating digitally.

No exception, the generation of grandparents and grandparents.  Many of them come down the mountain to share their place to participate and exist to enliven this one network.

Amazingly, the internet quota reserve for the grandparents' generation is even more powerful than the rest of the quota for the grandparents.  Not only that, their status is even fiercer than their descendants and great-grandchildren.

That's because many people consider WhatsApp to be the easiest social media application to use.

However, that does not mean that all account owners or users understand well the functions and how to use all the existing features, moreover to understand the impact of their use.

There are at least 3 important features in WhatsApp that are often forgotten by users, namely: Private WA Groups, Editing Group Info Features and the Export Chat Feature.

1).  Private WA Group.

WA group that contains only you.  By default, WA Groups cannot be created without entering a second person.

However, sometimes all members leave, for example, because their existence is considered by other members to be no longer important.  Then the last person who can take advantage of this situation.

WA groups like this can be used for personal purposes.  Not bad, can be used for many things, including: As an important link library googling results.  Of course it's just a collection of useful links that are likely to be frequently visited.  Educational, solution-based and so on, as useful articles in general. As a temporary storage (draft) for chat in the form of invitations, announcements, appeals and so on which are formal in nature or are considered not to be wrong  So that it can minimize the possibility of deleting the chat after it is published. As a place for the chat itself, it will reply itself.

 2).  Group Info Edit Features

WA Group admins often don't edit group settings, so group settings remain the default at conditions that allow all members to edit group info.

As a result, it often happens that members accidentally edit the group's subject, icon and description.

It could be because the admin doesn't know, it could be because they made it carelessly, it could also be because they forgot not to edit the settings.

How do I edit the settings?  here's how:

  • Enter the WA Group
  • Click the three dots in the upper right corner 
  • Click Group Info 
  • Click Group Settings 
  • Click Edit Group Info Select who can change the subject, icon and description of the group, 
  • Click Admin Only
  • Click OK

 3).  Chat Export Features

All our chat messages in Groups and via Japri can be exported to other groups or other private lines in the form of TXT format files.

This can have a positive impact on users, because with just 3 clicks, users can review chat data from start to finish.

I don't know how many chats the maximum is, but what is certain is that users don't have to scroll through hundreds or even thousands of chats one by one.

How to export it?  The method is:

  •  Go to your chat message (can be a group or Japri) click the three dots in the upper right corner
  • Click More
  • Click Export Chat Specify export options 
  • Click No Media or Include Media, this will affect the export file size only Specify WA Contact No or WA Group to export the file as usual 
  • Click to view  resultOpen with Custom HTML viewer

Because it turns out that in addition to this feature providing convenience for users, this can also have a negative impact if it is not used with good intentions.

Of course, this implies that we always remain wise in choosing the topic of conversation, both in groups and private channels

Because even if it's a private line, our chat can still be shared with other people in full.

It's also called social media, anything can be shared in the end.


 Hopefully this article can remind many people
Friday, January 15, 2021

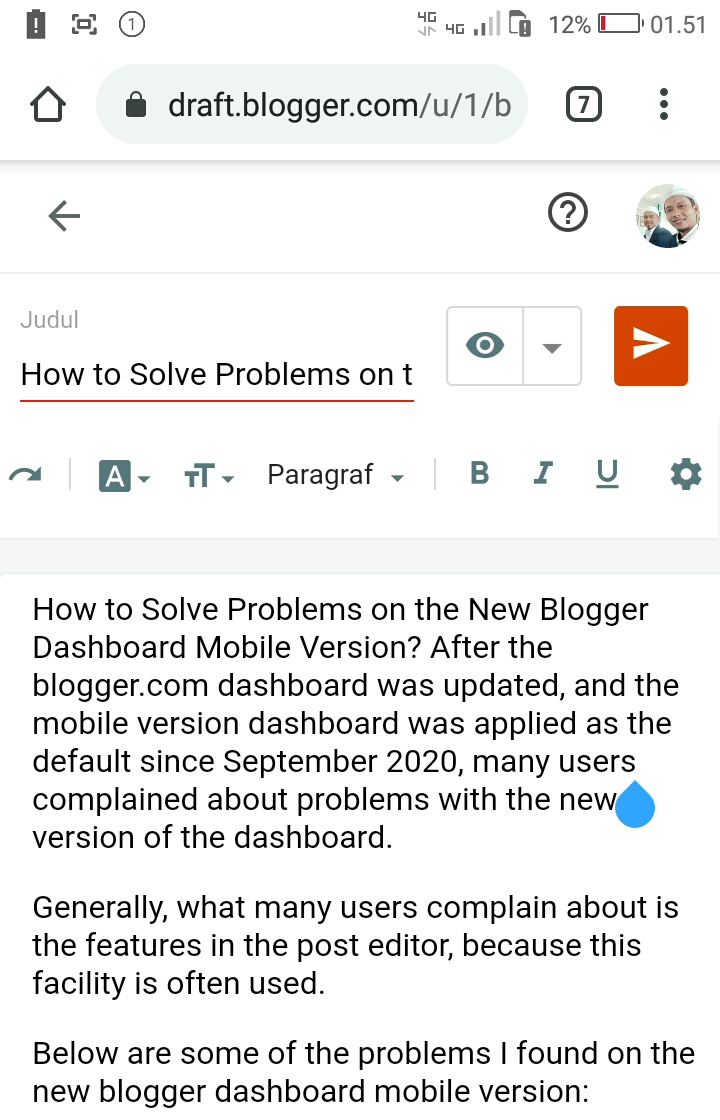
How to Solve Problems on the New Blogger Dashboard Mobile Version?

How to Solve Problems on the New Blogger Dashboard Mobile Version? After the blogger.com dashboard was updated, and the mobile version dashboard was applied as the default since September 2020, many users complained about problems with the new version of the dashboard.

Generally, what many users complain about is the features in the post editor, because this facility is often used.

Below are some of the problems I found on the new blogger dashboard mobile version:

Images cannot be inserted with a caption or description.  

This is a problem for some blogger users who often need an explanation below the image.  This is also a problem for some users of certain templates, where images without a description are stretched sideways.  How to Solve it?

  • You can Add image captions directly to the image before uploading. or..
  • Create a caption in html mode.  or..
  • Use a picture with a vertical shape. 
Images often move paragraphs.  

Well, this happens a lot.  The image suddenly moved.  How to Solve : 

  • Click undo!  or..
  • Move it again manually. 
Feature buttons often get error

Especially on font features.  Often clickable.  How to Solve it? : Just undo

Articles are often self-published.

Well, this is the most you have to be careful with .. Because articles that are still not ready can be published.  Even if what is published is an article that does not have an image, even if it is rewritten, the thumbnail does not appear in the related post.  But this is some users who use certain templates.  How to Solve it?  : Just be careful ...

How-to-Solve-Problems-on-the-New-Blogger-Dashboard-Mobile-Version

But it has a lot more advantages, especially in the theme editor.  To edit the theme., we don't need to use our laptop often.  So, adapt ... Because of course everything has been adjusted to the latest Google algorithm.

Monday, January 4, 2021

How to Replace Blog URL on Blogger

How to Replace Blog URL on Blogger.com?  There are 4 ways to replace. You can replace :

  1. oldsubdomain.blogspot.com by newsubdomain.blogspot.com
  2. subdomain.blogspot.com by domain.com
  3. domain.com by subdomain.blogspot.com
  4. olddomain.com by newdomain.com

4 This replace method I will explain one by one. Read through!

1). How to replace oldsubdomain.blogspot.com by newsubdomain.blogspot.com?
Steps for doing this are :
  • click your blog address
  • replace text oldsubdomain.blogspot.com by text newsubdomain.blogspot.com
  • click save
2). How to replace subdomain.blogspot.com by domain.com?
This method is known as "Custom Domain" and the result is known as "Custom Domain".  To do this, you must have a domain, this can be done by buying from a domain registrar (usually web hosting), you can also ask not to buy, if the owner of the registrar or web hosting is your grandfather.  Ha ha.

The steps to replicate it are not as simple as the first method, because you also need to make adjustments in domain management.

As for what must be adjusted in domain management are: Name Server, 4 A Records and 2 CName.  These adjustment steps are parallel.  So you have to access and stay on 2 dashboards, namely: blogger dashboard and domain management registrar dashboard (or web hosting)

There are 3 completion stages:
  1. Stage of getting 2 Cname packages on the blogger.com dashboard
  2. Stage of adjusting the name server and entering 4 A Records and 2 CName packages in Domain Management
  3. Stage of domain costume execution and propagation on the blogger.com dashboard

Stage-of-adjusting-the-Name-Server-Entering-4-A-Records-and-2-CName-packages-in-Domain-Management

Stage of getting 2 Cname packages on the blogger.com dasboard

  • Enter blogger settings >> Custom domain Enter the domain you've purchased, for example: websitoes.com.  
  • When this method is done, the blogger will provide 2 unique code packages called CName
  • Copy CName to be pasted at the next stage in Domain Management.

Stage of adjusting the Name Server, Entering 4 A Records and 2 CName packages in Domain Management.

  • Go to domain management at web hosting >> select domain >> Name Server. 
  • Usually, the Name Server doesn't need to be changed for custom processing to blogger.  So just leave it, and click save in the default conditions! 
  • Enter 4 records one by one, which is a set of numbers as shown in the picture 
  • Enter 2 Cname.  For the position regarding which column it is entered in, you can see an example of the image earlier so that it is not wrong. 
  • Click save

Now if at this stage there is an error, you will not be able to connect the domain to blogger.  So, make sure that everything is correct!

Stage of domain custome execution & propagation in blogger.com

  • Make sure the previous steps in domain management are correct. 
  • Enter the domain name again as before being awarded CName. Now you shouldn't be rewarded with a cname anymore, because it has been shot from domain management. 
  • Wait for the propagation process, usually 1 hour. Do not update anything during the process  propagation. 
  • After 1 hour, refresh your blogger.com dashboard page to update all the links that are embedded in all text on your blogger.com dashboard. 
  • If the page has been refreshed, turn on the HTTPS so that your blog address is secure.  
  • Wait 15 minutes
  • After 15 minutes have passed, try to access your web address.  
  • Success ...

3). How to replace domain.com by subdomain.blogspot.com?
This step is easier than the other three, because all you have to do is:
  • Delete domain.com
  • click save Refresh page.  If you click on view blog before refreshing, chances are that your blog cannot be displayed because the link that is inserted in the view blog is still https://domain.com has not changed to https://subdomain.blogspot.com, while the address is https:// domain.com has been uninstalled.  so this address is no longer blogging so it cannot be accessed.  So don't forget to refresh before looking at the blog.
4). How to replace olddomain.com by newdomain.com?
This method combines pattern number 3 change and continues with pattern number 2 change.But before proceeding to pattern number 2 it is important to change the old domain name server shot not to target bloggers.

I mean this so that the pointing of the new domain becomes more dynamic, where the blogger server that is shot is truly single.

That' my explain about How to Replace Blog URL on Blogger.

Sunday, January 3, 2021

How to Fix Problem of Difference Permalink Structure Before Step to Migrating From Blogger to Wordpress

How to Fix the Problem of Difference Permalink Structure Before Step to Migrating From Blogger to Wordpress? looking for answer this problem is the first strategy that you should think about before stepping on the stage of migration, so that all the URLs you have created on blogger don't become 404 error links.


To fix this case, the customizable object is not the blogger permalink, but wordpress. Because the blogger permalink cannot be changed, while in wordpress there are many options to choose from and can even be customized as the owner likes.

Well, choose or customize the structure to match the structure when your domain is still blogging on blogger ...

Adjusting the wordpress permalink structure with blogger is also important on new blogs that are starting to be built on wordpress, but there are plans that one day it will be moved to blogger.  So the structural equation between the two is very good if done early.

How is the blogger permalink? For example, Look at the permalink screenshots of this article on blogger!

how-to-fix-problem-difference-permalink-structure-wordpress-blogger

From the example image above you can see that the blogger permalink structure is https://www.domain.com/year/mounth/post-name-or-your-custom-post-title.

So the conclusion: there are 2 components of the blog permalink that must be equalized, namely: the use of www in the main URL, and displaying the year / month / post-name in the structure.

1). The main URL must be www

Generally the URL of the web / blog hosted on blogger is www.  Generally the URL of a web / blog hosted on wordpress is without www.  So, make it www!

This step can be done directly via the general settings menu (settings >> general) not necessarily from CPanel.

  • Change from the previous https://yourdomain.com to https://www.yourdomain.com
  • then click save.
  • After saving mode, you will be asked to log in to wordpress again by entering your email address or wordpress username and password.  of course, because the address has now changed.
  • Done.

2). Permalink must display year/month/post-name

To choose or customize the month structure and name, you can do it through the permalink settings (settings >> permalinks) on the wordpress admin dashboard.

To do this you need to : 

  • Choose one of the options or customize it directly so that later the wordpress permalink structure will be customized to be the same as blogger.  see an example image below on websitoes.com (one of my webs hosted on wordpress.org)
    Choose-One-of-the-Options-or-Customize-Wordpress-Permalink-Structure

  • then click save!
  • Done.

Both of these methods must be done before you import the back-up blog data, so that it is not 404. but it is better if you have previously changed from http to https so that structural changes occur when the blog is secure.

if you have questions about this, you can ask me at comment.... thank you!

Saturday, January 2, 2021

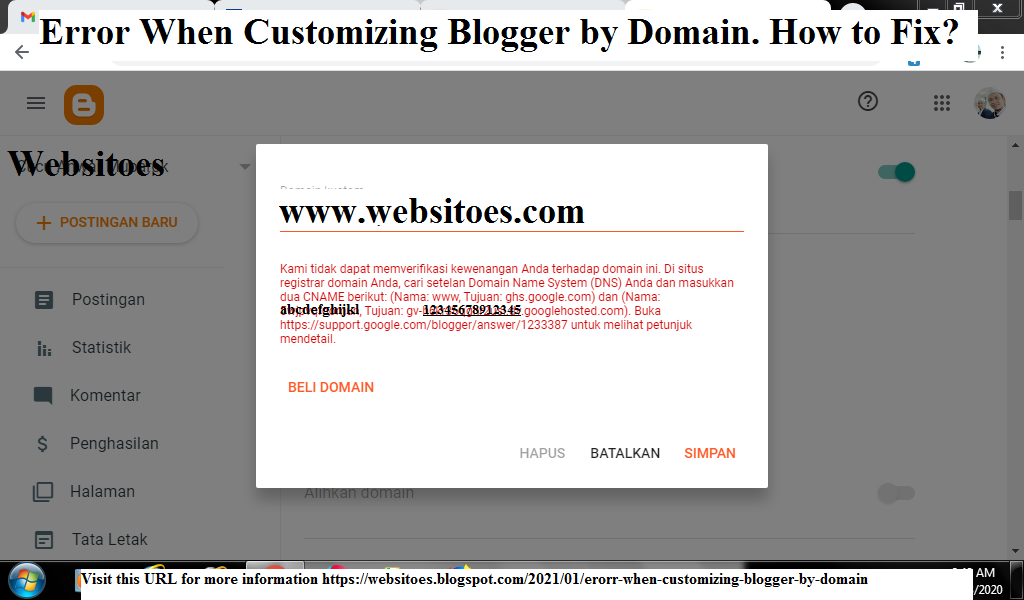
Erorr When Customizing Blogger by Domain, and How to Fix

What Errors Can Occur When Customizing Blogger by Domain? What caused it? and How to fix it?

The essence of the progress of customizing a blogger domain is the process of connecting it from DNS Management to the admin dashboard in blogger. When that is done, there will be some error problems. However, there are errors that are normal in this process, and some are not and require repair.
What Errors Can Occur-When-Customizing-Blogger-by-Domain
The following are some types of errors that can occur when customizing a blogger domain along with the causes and how to fix them:
1). Domain error cannot connect when first connected to blogger.com. 
This first type of error is very normal, because the domain has not been directed to blogger server. How to fix it? 
  • direct the domain name server (if your domain is new, this method is actually not necessary because by default it usually points in the right direction, namely the web hosting)
  • adds 4 A Records (216.239.32.21, 216.239.34.21, 216.239.36.21, 216.239.38.21)
  • add the CNAME that blogger gives when this error occurs on the blogger dashboard (www with ghs google.com and two unique codes)
2). Error domain still can't connect after you point to the name server, adding 2 CNAME and 4 A records. 
This error must not occur and must be resolved immediately. The reason may be because you 
  • made a mistake when determining the direction of the name server (this is very likely to happen if your domain has been used before to blog on WordPress on a different web hosting package, then you have not returned the nameserver to the default condition, namely the web hosting server where DNS Management located)
  • Wrong to match when you added 2 CNAME (note, don't get confused)
  • Wrong when you type numbers of A Record (note 32 34 36 38 on the four A Records)
3). The errorr blog cannot be accessed immediately after the domain has been customized. 
This is because you have not refreshed the page, so the link that is inserted in the view blog posts is a link that leads to a site with an old URL. It is enough to be overcome by refreshing the dashboard page and clicking view the blog once again.

Those are the errors that usually occur when customizing blogger by domain. 
If all the ways to fix the error problem that I have described don't work, there is another problem with your domain. Contact web hosting customer service and explain that there is a serious problem with the domain you have purchased.

4 Causes of Erorr 404 and How to Fix

4 Causes of Erorr 404 and How to Fix - Error 404 on web-blog is one problem that is avoided by all webmasters.  Because it can result in a very bad image of the web-blog that is owned. Example : 404 erorr page on this blog websitoes designed by naminakiky and arlinadesign the legend of indonesian bloggers 

4-Causes-of-Erorr-404-and-How-to-Fix

The first step to prevent and overcome the 404 error problem is to detect what is the cause, because there are 4 causes of 404 error, namely:

Cause 1 - Pages, articles or other content (image, video, audio) has been deleted.  Every time you delete anything on the web you also wish to remove the link from the web.  But the reality is not so, because it takes time for these links to disappear completely from circulation on the internet, especially from search engines.  Even though we have submitted a request for removal from circulation directly through the deletion menu in the google search console.  How to Fix the Cause 1? The fix is ​​by redirect links to pages / articles / other relevant content before deleting them.

Cause 2 - Pages, articles and other content (images, videos, audio, etc.) are not deleted.  But you have updated the alt link text.  example case: Previously, the content URL was https://websitoes.blogspot.com/2021/01/how-to-fix-erorr-404-after-migration-from-blogger-to-wordpress.  But you have updated the alt by https://websitoes.blogspot.com/2021/01/how-to-fix-erorr-404-after-migration-from-blogger-to-wordpress. Link updates can also occur even if you only change the publication date.  Example case : Previously, the content URL was https://websitoes.blogspot.com/2021/01/how-to-fix-erorr-404-after-migration-from-blogger-to-wordpress. But you have updated again by https://websitoes.blogspot.com/2021/01/how-to-fix-erorr-404-after-migration-from-blogger-to-wordpress. How to Fix the Cause 2? fix this ​​problem by redirect the old link to the new link!

Cause 3 - There is no change in the unit of each page, article, or other content (images, video, audio, etc.).  But you have changed the main URL or domain from being www (like websites url hosted on blogger.com) to being without www (like most website url hosted on wordpress.org).  Example case : The previously URL of your domain is https://www.websitoes.net, then changed to https://websitoes.net or vice versa.  This change often occurs on migrated web / blogs.  For example: you move the blog domain with www from blogger.com to wordpress.org by removing the www, or you move the blog domain without www from wordpress.org to blogger.com which has www.  How to Fix the Cause 3? the fix is ​​to make it consistent using www.

Cause 4 - There is no change in the alt link text, there is no change in the publication schedule, there is no change in the domain URL from www to without www.  But there are changes to the permalink structure.  Example case : Previously my website was at blogger.com, meaning the permalink was https://www.websitoes.com/2021/01/text-alt-post-title, and then migrated to wordpress.org which offered several permalink structure options, then I didn't  choosing a custom structure is the same as on blogger.com, it will result in 404 error problems for pages, articles and other content that have been published on blogger.com and backed up and then imported on wordpress.org.  How to Fix the Cause 3? The way to solve this problem is to always consistently use the permalink structure wherever the web domain is hosted. 

Those are the 4 causes of 404 errors and 4 ways to fix them. Thank for visiting this blog!

WP Admin Cannot Be Accessed Even Though Wordpress Has Been Installed

WP Admin Cannot Be Accessed Even Though Wordpress Has Been Installed.  What caused it?  How to fix it?

This is a problem that must be resolved immediately, so that your website can be used immediately.  Because if it can't be accessed, your wordpress website will be useless, and your money is wasted.

wp-admin-cannot-be-accessed-even-though-wordpress-has-been-installed

If WP Admin can't be accessed, most likely the cause is:

  1. You wrote the wrong URL.  errors like this are usually done by new users, because they don't know how to write the correct url.
  2. There is data in wp_config_php which is not the same as the data in MySQLDb.  This can happen if you previously changed the database, or you deleted the data without realizing that the deleted database was related to the wordpress installation account.

How to fix the 2 causes of the inaccessible WP Admin?  Using wordpress is not as simple as using blogger, where to solve this problem you must first enter the web hosting member area.  next, try to solve in 2 ways:

  1. Try typing the URL again correctly, who knows, it might just be a typo.  example of correct writing is https://yourdomain.com/wp-admin
  2. Try opening wp-config-php in CPanel >> File Manager >> Public html >> wp_config_php, who knows there is data that is different from the data in MySQLDb.  Adjust the data: Curent_Db, User_Db and Password. if you forget your password, you can create it again in MySQLDb on the same Curent Data Base and User Data Base listed in wp_config_php.  Next, you edit the wp_config_php.

Those are 2 causes of "WP Admin cannot be accessed even though wordpress has been installed" and how to fix it.